Your basket is empty.
 Free shipping over £159 Open purchase 30 days Fast delivery Customer service 0300-308 60
 Secure payments with Qliro
 B2B LOGIN
Free shipping over £159
Open purchase 30 days
Fast delivery
Customer service 0300-308 60
Secure payments with Qliro
Do you see well around the machine but less well down by the bucket? Then it is not certain that brighter lights are the solution. When you choose work lighting for an excavator, wheel loader or other construction machine, the light pattern and placement need to work for the work you are doing. Here we go through what you should check, from the work area and lamp choice to durability and connection.

First, look at what the existing lighting is missing. Do you need to see the implement more clearly, get a better overview to the side of the machine, or illuminate a work area further away? This will determine whether you need to change the placement, add more work lights, or choose a different light pattern.
On an excavator, the working area changes as the boom, stick and bucket move. Lights that work with the bucket close to the machine can be obscured when the attachment is in a different position. On a wheel loader, you also need to check what is visible with the loader in the positions used during work.
Assess the light from the operator's seat and also check for reflections in the windows and glare for others working nearby. If the machine has a camera, the image needs to work with the work lights on. Determine the number of lights based on the areas that need to be illuminated, not based on a general rule for all machines.
Flood means wide light and is a good starting point for the work area near the machine. If you need to illuminate a narrower area further away, a more directed work light may be more suitable. Look at the light distribution and the intended mounting position together, not just the beam angle.
Lumen indicates the light output from the lamp. However, a high lumen output alone does not indicate how well the light reaches the bucket or is distributed over the ground. Compare stated actual lumens with actual lumens, not with raw or theoretical values.
In the range with work lights finns både enskilda arbetsljus and work light bars. Välj format efter utrymmet och infästningen och ljusbild efter området som ska belysas. Arbetsljusen för jobbet och belysningen för transportkörning behöver bedömas som olika funktioner.
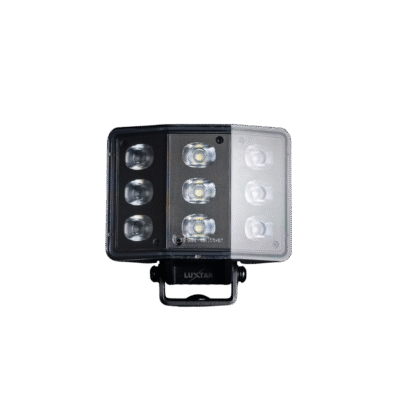
We recommend starting with the Luxtar Pro Noir when comparing wide LED work lights for your machine. Pro Noir WL60 Curved is an option for wide lighting near the machine. Pro Noir WL90 Curved has the same specified beam angle and a higher specified actual luminous flux.
The information below is taken from the product pages:
| Luxtar Pro Noir | Actual luminous flux stated | Specified light image | Voltage range |
|---|---|---|---|
| WL60 Curved | 4 760 lm | 120° flood | 9 to 36V |
| WL90 Curved | 7,800 lumens | 120° flood | 9 to 36V |
The WL90 is worth comparing when you need more light output with a wide spread. This does not automatically mean longer range or that it can replace multiple lamps in different locations. Check the dimensions, mounting and power requirements of both models before making a decision.
The IP rating describes the protection against ingress of dust and water. It does not in itself say how well the lamp or bracket can withstand vibrations and impacts. In a construction environment, you therefore need to check both the enclosure and the manufacturer's information on mechanical resistance.
IP68 applies to immersion in water under specified test conditions. IP69K applies to testing with water at high pressure and high temperature. These are different tests, so do not treat IP69K as a general promise that the lamp will withstand all washing or all types of water exposure. Follow the product's cleaning instructions and also check the protection of the connections.
EMC is about electromagnetic compatibility. ECE R10 is an EMC approval, while CISPR 25 describes testing for radio interference that can affect receivers in the vehicle, such as radio and GPS. R10 and CISPR 25 are therefore not different steps on the same rating scale. The marking is also no guarantee of interference-free operation in every machine.
If the radio starts to interfere after a bulb replacement, check to see if the interference occurs when the new work lights are turned on. Then have the installer examine the bulbs and the installation. The symptom alone does not indicate which component is causing the problem.
Just because a work light is specified for both 12V and 24V does not mean that the entire installation will fit without checking. The Pro Noir models above are specified for 9 to 36V, but the machine's electrical system, connections and controls also need to match the lights.
Please send us the machine model, pictures of the mounting locations and a description of what you would like to see better. We can then help you choose work lights and determine what additional equipment your installation needs. If you also want to equip the car that accompanies you on the job, there is a separate guide to work lighting on the service vehicle.
Customer service
Do you need help with work lights for the machine?
Describe the machine, the work area and where the lights will be located, and we will help you choose.