Your basket is empty.
 Free shipping over £159 Open purchase 30 days Fast delivery Customer service 0300-308 60
 Secure payments with Qliro
 B2B LOGIN
Free shipping over £159
Open purchase 30 days
Fast delivery
Customer service 0300-308 60
Secure payments with Qliro
Should you mount a LED ramp at the license plate or fold it into the grill? The location determines how the bracket and wiring need to be done, while the car's high beam control determines the connection. Start by measuring the space and checking which parts fit the car. This will allow you to plan the installation before you start screwing or cutting into the front.
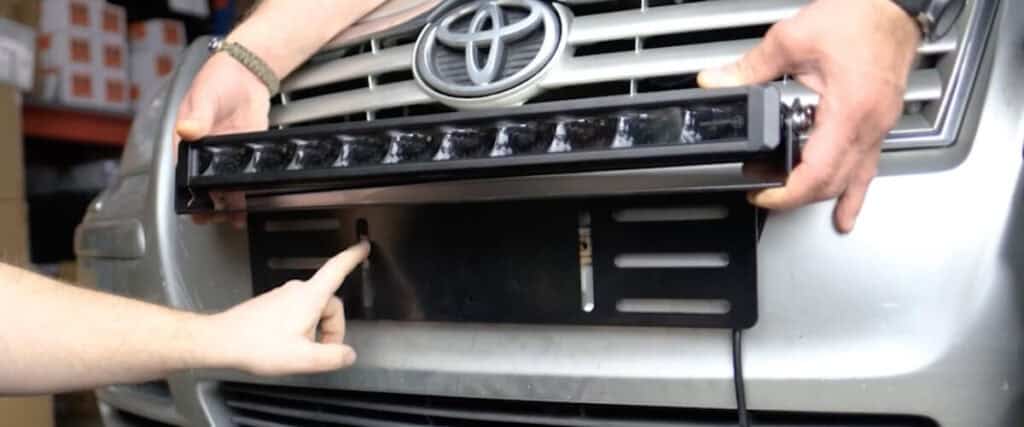
An LED ramp can be mounted on the license plate, in the grill or on the roof with a solution designed for that location. Which mounting is suitable depends on the car, the dimensions of the ramp and how it can be attached stably.
At the license plate sitting the attachment to the articulated ramp behind the sign, while the ramp itself is placed above or below it. On some cars it is possible to use existing attachment points, but check the holder's instructions and what the attachment requires on the specific car. Scaffolding ramps are alternatives to compare for that location.
In the grill The ramp can be folded in for a more discreet look. This may require a cutout in the grille and brackets adapted to the car. Measure both the opening and the space behind it before choosing a ramp.
On the roof The ramp requires brackets intended for the roof or roof rack and a planned cable route. Also check how any penetrations are to be sealed according to the instructions. A high location is not automatically a better choice than a front mounting.
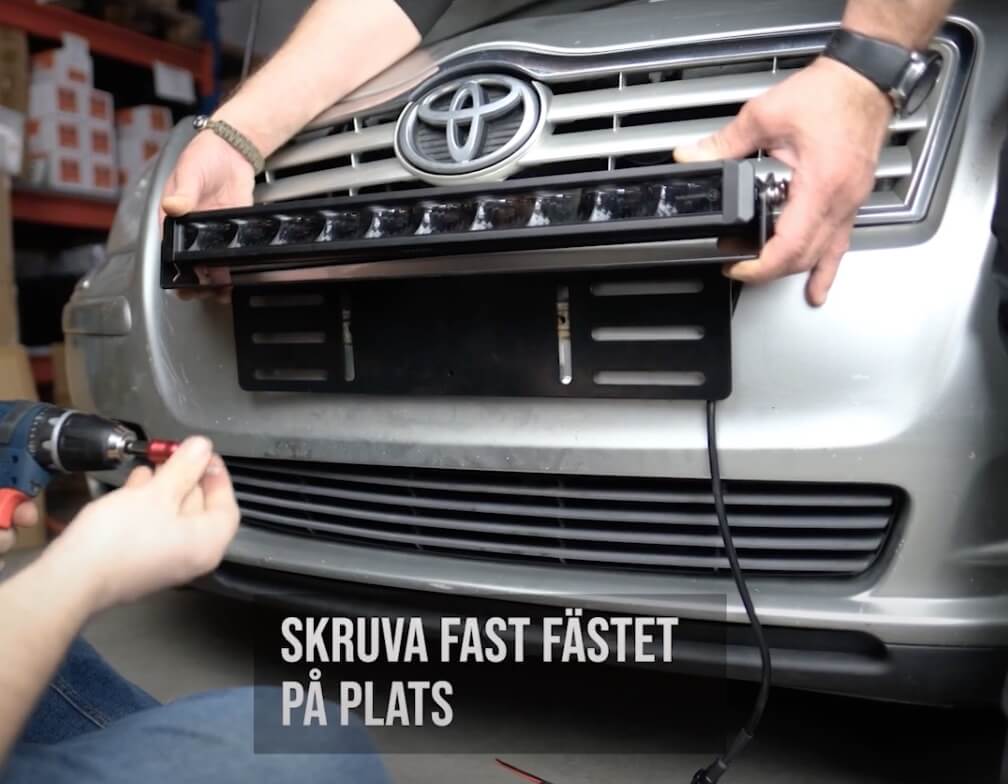
The video shows an installation on a Toyota Avensis. Use it to see the steps and then check the connection against the instructions for your car and the parts you are using.
The ramp needs a stable mount, a secured power supply that can handle the power consumption and a control that works with the car's high beams. A relay cable set is a common solution for the power supply. If you use XBB or another control system, the wiring should also fit that connector. Our guide to wiring for auxiliary lights helps you check contacts, load and control before purchase.
The procedure below is based on a ramp at the license plate. Read the instructions for the car and accessories first, including how to de-energize the car before working. Connections and attachment points need to be adapted to the specific car. The video and images show examples of work steps.
Determine where the ramp will be placed. Measure the entire installation, including brackets, connector and space to angle the ramp. The license plate must be visible and the location needs to work with the car's sensors, cameras and air intakes. Also check where the cable can pass behind the bumper. Mark the location with tape before you start installing.
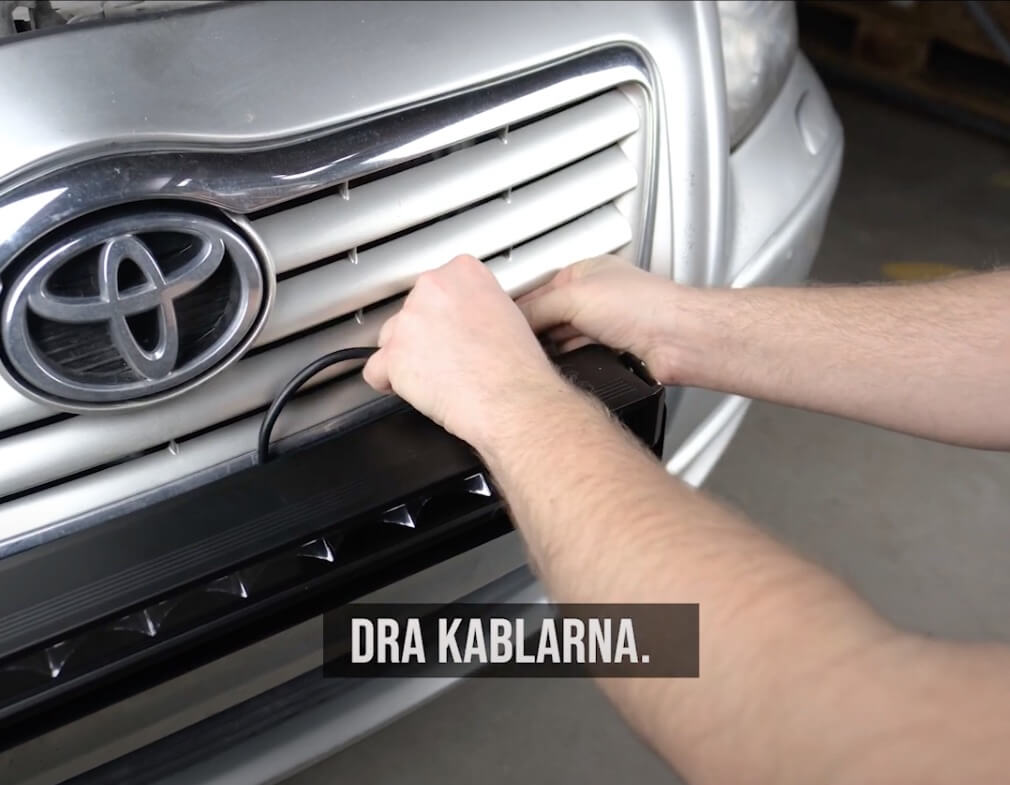
Loosen the license plate and the license plate holder. Fit the articulated ramp bracket and mount it with the fasteners and in the points indicated in the instructions. Check what is behind before drilling or screwing. Attach the ramp and replace the sign so that everything is stable, with the possibility of aligning the light before final tightening.
Connect power and ground according to the car and cable set's wiring instructions. The fuse should be located close to the voltage source. Use the car's specified connection points for accessories. On cars with battery monitoring (BMS), the connection points need to be checked so that the monitoring also works with the auxiliary light. Direct connection to the battery terminals is therefore not a general recommendation for all cars. In a standard relay connection, the ramp receives a separate power supply, while the high beam signal controls the relay.
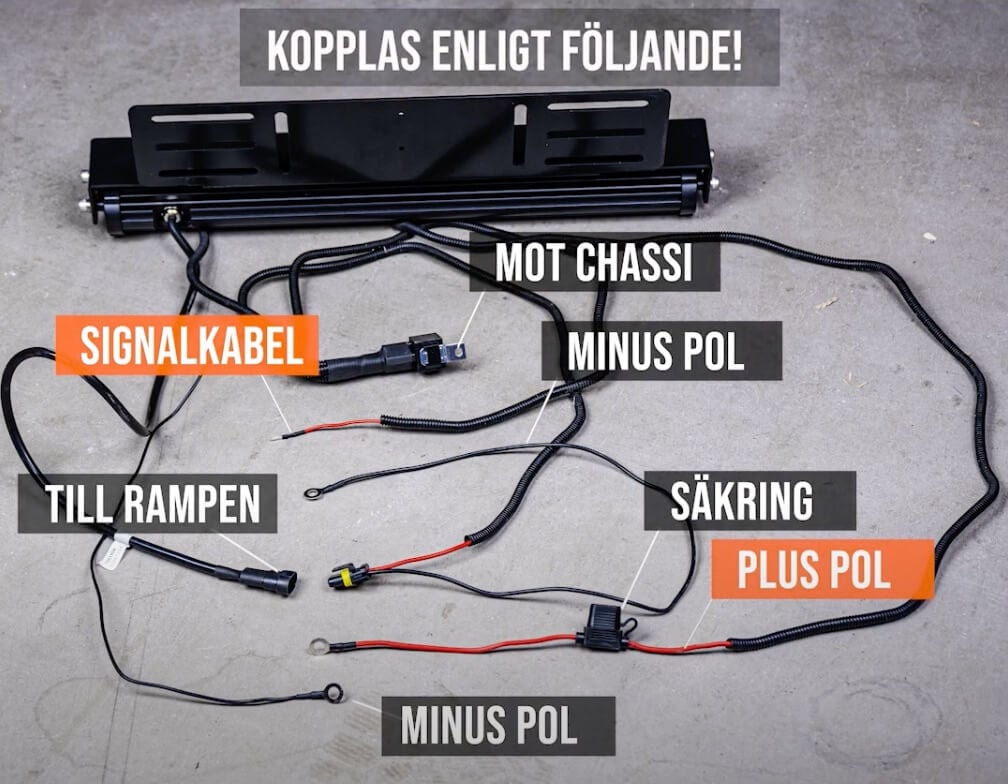
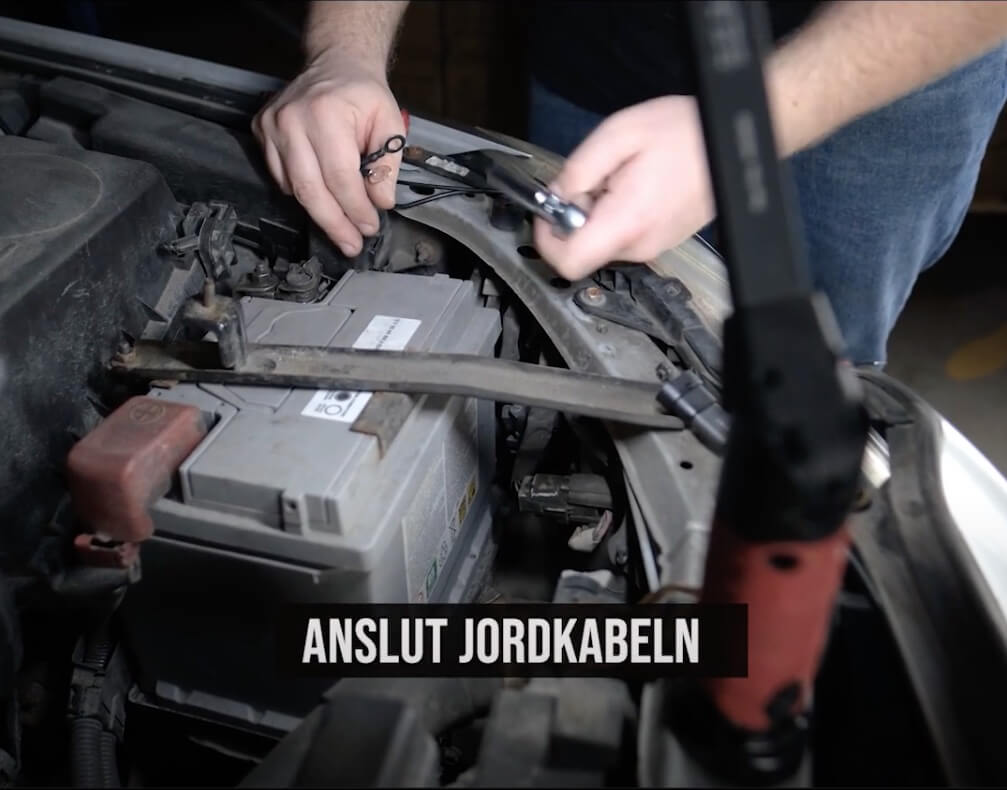
Check that the ramp connector, polarity and pin placement match the wiring harness before connecting them. Route the cables behind the bumper and on towards the planned feed, preferably along existing cable routes. Secure the wiring without stretching it and protect it from sharp edges, hot parts and moving components.
The control should cause the ramp to light up with the high beam and go out when you dim the lights. Choose the connection according to the car's actual high beam signal and the connection data that applies to the car. Model year, halogen, xenon or LED alone are not enough to determine the method.
With a useful high beam signal a compatible relay wiring harness can be controlled by it. Connect the signal cable according to the car and wiring harness diagram. A multimeter can be included in the check when the correct measurement points and measurement method are known. Avoid trying to find your way around unknown wires or choosing a connection based solely on the wire color.
Med XBB Dongle and PowerUnit you start by checking that a recipe works with the car model and its equipment. In a compatible OBD installation, the dongle is plugged into the car's diagnostic socket and communicates wirelessly with the PowerUnit. The ramp still needs cables for power supply. Follow XBB installation manual for configuration and load limits, including when a separate power relay is needed. Some cars require a different connection or solution.
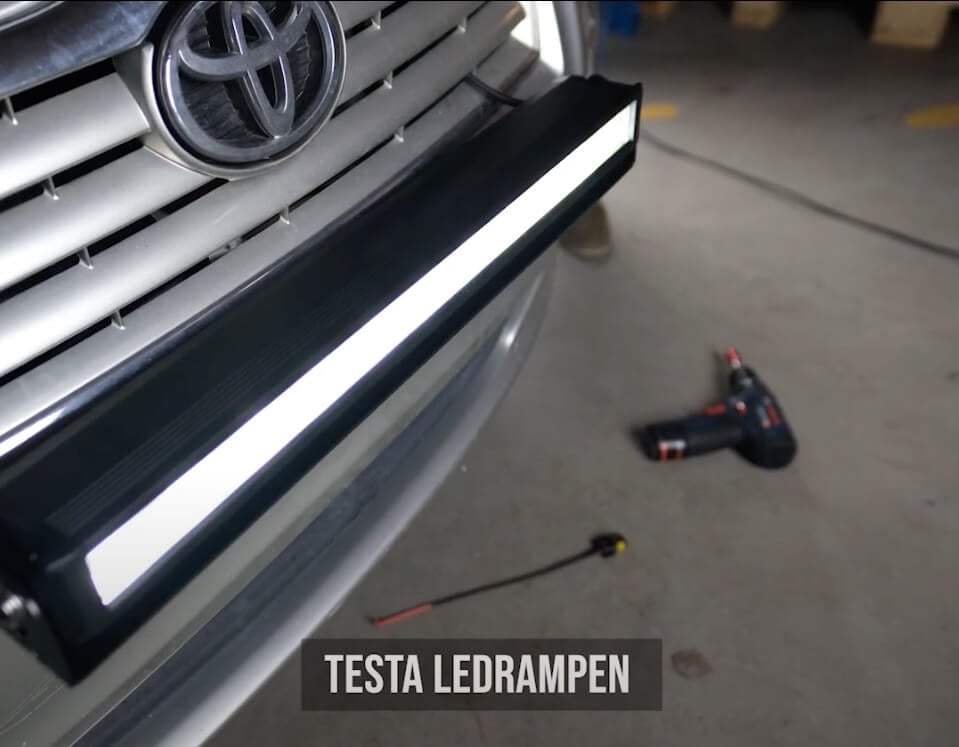
Check the connections and power up the installation according to the instructions. Test that the ramp turns on and off as intended when you switch between high and low beams. Also check automatic high beams if the car has that function. With XBB, the rest position should also be checked according to the manual. Align the ramp according to its instructions, make the final tightening and check that the cables are protected. Any position lights need their own check of connection, placement and approval.
A recessed ramp needs space both in the grill opening and behind it. Check the brackets, adjustment space and how the cable should be routed before making a cut-out. Follow model-specific instructions where available and check what is behind the grill. Cutting the plastic grille does not replace a stable attachment. Power supply and high beam control are still selected according to the car and the ramp.
For road use, the ramp needs to have the correct approval for high beam and be installed and used according to the regulations that apply to the car. An E-mark can refer to different functions; for example, ECE R10 applies to electromagnetic compatibility and is not in itself a high beam approval. Also check which power mode the approval applies to. The ramp should go out when you switch to low beam. Position lights and other additional functions have their own requirements.
The installation time depends on how the front is built, the access to the mounting points and which high beam control is needed. A flush mounting with disassembly or cut-out is a different job than a mounting at the license plate. Therefore, there is no general time that applies to a complete installation on all cars.
Are you buying one? led light bar kits you should check exactly what is included and what the car requires in addition to the package. Also check the voltage, connector series, pin placement and permissible load for the entire installation. A package with ramp, bracket and relay wiring kit may still need to be supplemented for the car's high beam control.
It depends on the installation location, access and the car's high beam control. Removing the front, cutting out and adapting the wiring will affect the time required. Plan according to the car in question and the instructions.
The ramp needs a secured power supply and a compatible control. A relay cable set is a common solution, but with XBB, for example, you choose cabling according to the system's instructions and the ramp's power consumption.
First check which high beam control is supported for your car. XBB can be an option if the right recipe and connection work. The dongle and PowerUnit communicate wirelessly, while the lighting still needs power cables. The car's model year alone does not determine compatibility.
A ramp intended for road use needs the correct high beam approval and correct installation and use. Check which power mode is approved and that the ramp goes out when switching to low beam. ECE R10 or a functioning connection alone is not enough to indicate road use.
Measure the space where the ramp will be located and take into account brackets, connections and the possibility of directing the light. Then compare the exact product dimensions. Our guide to choosing LED ramp helps you weigh size and brightness against use.
Once the location and connection are determined, you can choose LED light bar, bracket and wiring that work together. If you are still comparing ramps, our guide to choosing the right LED ramp up light pattern and mounting dimensions, with Luxtar X20 and Twilight as alternatives for different needs. For a broader overview of power supply and control signal there is also the guide to installing additional lights.
Do you need help with the combination, contact us with car model, year, headlight design and link to the ramp you intend to install. Then we can check what is needed before you order.
Installed and Ready
Would you rather have a workshop install it?
Buy extra lights with installation, and one of our partner workshops will install them for you. Installation has a fixed price and is booked when you shop.